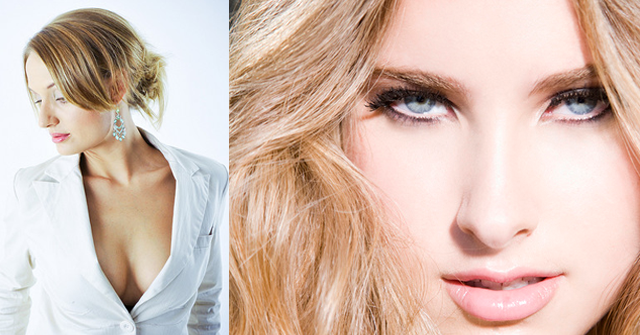
Waxing vs Shaving

Every woman wants soft, smooth and radiant skin. Smooth legs and arms are desired by women, and smooth skin is an especial before applying spray tan. However, many women wonder which hair removal method is better; waxing or shaving. Here are a few features of waxing and shaving to help you decide which technique works best for you.
The major benefit of waxing is the amount of time you skin is left hair free. Typically waxing prevents hair from growing for about 6 weeks. Waxing allows hair to be removed from the root rather than just cutting it at the surface of the skin. Since waxing removes hair from the root, the amount of time for it to grow back is longer than shaving. However, this method of hair removal can be more painful. Some people who have sensitive skin can find waxing to be irritating. Sensitive areas like the bikini and under arm area tend to be the most painful when waxing. If you decide to wax, make sure your hair is at least 5mm long to get the most of your waxing. It’s harder to wax short or stubbly hair and the results won’t be as good. Waxing provides a longer lasting hair free look and leaves your skin smooth. There are many different types of waxes, so it’s important to know which one is best for you and your skin type. Waxing can also save you money because you won’t have to wax as frequently as you would with shaving. It is especially economical if you choose to use do-it-yourself home wax strips or hot wax. To have hair free skin that lasts longer, waxing is definitely the way to go.
Shaving is another alternative to smooth and hair-free skin. Every woman who shaves their legs knows that shaving only lasts for a few days. Within a few days stubble starts to develop and you have to shave again. However, shaving is quick and painless. It only takes a few minutes to get smooth and silky skin. Shaving removes the hair by cutting it at the surface rather than removing it from the root. This is why the hair grows back quickly. If you prefer shaving over waxing, you want to shave your legs the day before your spray tan and several days after your tan. Shaving can ruin your tan if you shave a day after. Waiting several days will allow your tan to fully develop.
Whichever method of hair removal you choose it is important to wax or shave a day before you tan. This will allow your tan to cover evenly and settle into your pores, giving you an even, radiant and sun kissed look- that will feel as good as it looks!
Comfortable Customers
Making your customers feel comfortable is extremely important in the tanning business. You want to keep a professional yet friendly attitude that makes your client feel welcomed to your indoor tanning salon. Here are a few tips to make your customers feel more at ease.
Greeting your client is a small but important step towards making your client feel comfortable and welcomed to your tanning business. In a personal but professional manner, ask them questions about the tan they want to achieve. Let them know that you can assist them with any questions they might have about their tan such as colour lasting, bronzers, extenders and about whatever else they might be concerned. Provide any helpful tips about maintaining a spray tan, fixing a spray tan if it should go wrong, and how to boost their colour with enhancing lotions and bronzers. The more information you supply to your client, the better they will feel about getting a spray tan, especially if they are a first time customer.
Some clients aren’t fond of getting completely naked in front of a total stranger at an indoor tanning booth. If your client isn’t sure about spray tanning naked, remind them that bathing suits are completely acceptable when being spray tanned. Give your clients options such as spray tanning with a bathing suit, being in just a bathing suit bottom, thong style panties or going naked. You want them to wear whatever makes them feel the most comfortable. For the most natural look, you might want to tell your clients the benefits of spray tanning naked. It leaves no tan lines and makes the tan look even and natural from head to toe.
When spray tanning your clients, remember to remain professional at all times. Every body shape is different and some clients may feel more insecure than others. As you spray tan your client, conversation may make them feel more at ease. Besides telling them to change positions in specific poses, try talking to them on a more personal level with light and upbeat topics relating to their tan. Friendly conversation can ease the awkward feeling your client may encounter.
By making your clients feel comfortable they will develop a trust with you, resulting in coming back for your indoor tanning business. It’s a benefit for both your client as well as your tanning business.
Are Tanning Injections Safe?

A range of healthier, sunless tanning products and processes have hit the market over the past decade. Whatever the manner, all tanners are in search of that perfect quick and easy yet natural-looking and evenly tanned appearance. In recent years, tanners have turned to the “Barbie Doll Drug,” a tanning injection that, interestingly, hasn’t amassed nearly as much media attention as predicted.
The drug, known as Afamelanotide (also known as Melanotan), is a manmade drug that replicates the body’s alpha melanocyte stimulating hormones. The hormones stimulate the production of melancoytes- skin cells found in the deeper layers of the skin’s outer layer. These hormones create melanin, which is a pigment that protects the skin from harmful sun exposure by darkening the skin and producing the tanned effect. Melanin is more active in darker skinned individuals; the hormone, therefore, protects those with darker skin, more than their pale skinned counterparts, from the risks of sunburn and skin cancer.
The creation of Afamelanotide traces back to research to protect those whose genetics put them at a high risk of sunburn and/or developing skin cancer. In recent years, however, the injection has morphed into a tanning injection, leaving users with a “Barbie Doll effect”; a flawless, evenly- toned, golden tan. The benefits: tanning injections do not streak and can’t wash off. But the flip side: the risks of an injection have not been identified; Professionals currently have no knowledge of any long term side-effects of the drug.
Currently the drug is being researched in clinical trials in several countries, including Australia, the United States and the United Kingdom. The trials produce promising results, although no license or approval for the tanning injection has been issued as of yet. The Australian company, Clinuvel, presently regulates and develops the drug that is used as a tanning injection.
So is this “Barbie Doll Drug” safe to use or is this a tanning tactic to avoid? Essentially, there’s no clear path pointing either way. What you can be sure about, however, is that tanning injections leave you with one of the most natural looking tans: no streaking, no washing off. Makes your search for the perfect sunless tanning product that much easier!
Make-up Tips to Match your Tan
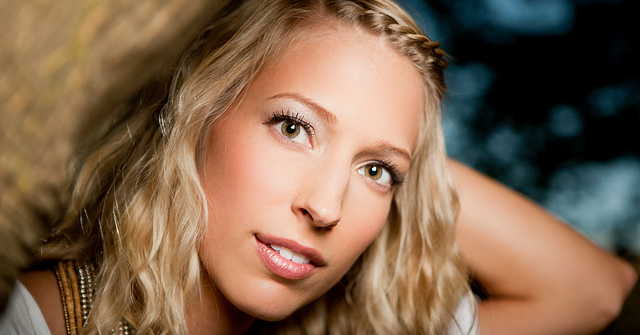
The colour of your skin changes every time you have a tan and that means you have to adjust your makeup arsenal accordingly. This adjustment does not have to be too difficult, especially with these simple makeup tips. If you regularly get a spray tan or use self-tanning lotions you will be used to having a strong tan in the first few days that tends to fade by day 5 to day 10. As your tan changes you need to update your makeup accordingly.
First of all you should invest some time and thought upfront to work out what colours will suit you when you are freshly tanned and as your tan starts to fade. Much of this can be done with a little trial and error as your apply different colours throughout the life of your tan. One of the golden makeup tips is that you must choose your make up style and colours according to your skin tone. A tan will only work to darken your skin based on your original skin tone.
Foundation has to be the toughest makeup item to match with your tan. If you are comfortable with your skin you can forgo foundation altogether. When you have a tanned face, it already gives you the sun kissed look. Foundation will only destroy the glow. To enhance the glow of your skin, use tinted moisturiser. It will even out the blotchiness if you have any, leaving your skin smooth, soft, light and silky.
However, if you just feel a little “naked” without your foundation these makeup tips will help you find your perfect match. Always have a foundation on hand that matches your most tanned look and another bottle of foundation that matches your least tanned skin tone. As your tan progresses from dark to pale to dark again, mix different proportions of each together to get your perfect colour.
To avoid an overdone look, use a bronzer instead of blush when you have a tan. Bronzer will also enhance your glowing tanned look. For eyes, your aim should be to give them a simple, sexy and shimmery look. Apply a peach toned or pale pink shimmer powder around your eyes. Use a light coat of brown mascara on your eye lashes. Use of eye liner will give you a heavy and made up look. So give your eye liners a rest if you can, but if you really cannot do without them, use a very thin line of a brown or charcoal eye liner.
You need to give your lips a sleek and sexy sheen. First line your lips using a brush and your lipstick instead of using a lip liner. Apply a light coat of a pale orange or peach for that perfect almost “nude” look. Even a tinted lip gloss alone will give you a fresh and natural look. Follow these simple makeup tips and you cannot go wrong when it comes to matching your makeup with your tanned skin.
Tips to Avoid Tanning Streaks

Are you sick and tired of looking pasty and pale? Do you want to get tanned without the dangers of getting sunburnt? One of the best solutions is self tanning… if done properly. After all you want to avoid that bad tan look! You have to be very careful when it comes to applying your self-tanner. If you don’t respect a few golden rules before tanning it can turn into a disaster. One of the biggest bad tan blunders we need to avoid are tanning streaks. Here we look at how you can prevent a streaky, splotchy mess and how to fix tanning streaks in case they happen. How to avoid streaks, blotches, and stripes?
Prepare your skin beforehand:
• Shave your legs • Exfoliate. Start exfoliating a few days before you apply self-tan. • Moisturise. Avoid over-moisturising immediately before you apply the product, but ensure that your skin is hydrated for an even, long lasting tan. Focus on dry areas such as knees, elbows and heels. Apply the tanner: • Slowly and smoothly • Be sure to rub it in completely, paying extra attention to the knees, elbows, feet, and neck- all parts of the body that will absorb the tanner more readily. Looking streaky? Here are some tips on how to get fake tan off and smooth out your tan. First of all, don’t worry, bad tans are not forever – self tanning does not last more than one week. There are also a number of methods to remove tanning streaks. • Exfoliate the streaked area with warm water and an exfoliating cloth or loofah sponge. • If the tanning streaks are on your face you can use some bronze make up to enhance and balance your complexion. • Apply moistened baking soda to a washcloth and gently rub it on the offending streaks in a circular motion. • Dip a clean cotton ball into rubbing alcohol and swipe it across your sunless tanner streaks. • Use lemon juice as a natural way to remove a bad tan. Gently rub a cotton ball soaked in lemon juice over the affected area. For larger areas you can cut a lemon in half and rub it directly on the stains. • Use a commercial sunless tanning remover. • Apply some baby oil to the areas where the tanning streaks are the surrounding area. Then wait for around an hour. Take a bath and brush with a sponge or face cloth. • Mix some white vinegar with a little water to dilute it slightly. Apply this solution to the bad tan areas. Simply by following these rules you will enjoy a streak-free tan that looks natural and is long-lasting.
Natural-looking Bronzer Tips
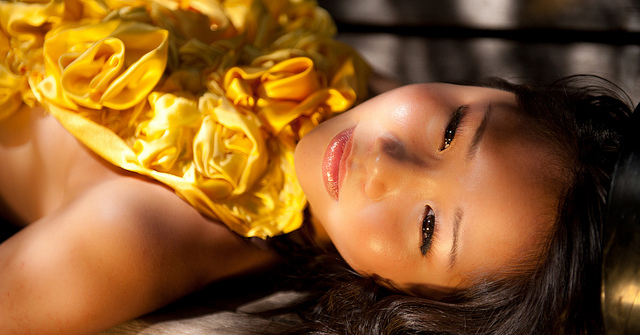
1. Brushes For a natural, even- toned result, use different brushes for each of your products. Yes ladies, a new brush for your power foundation, your blush and your bronzing powder. This prevents the colours from mixing, allowing you to achieve the precise results you are looking for. 2. Bronzing Base Brush on your bronzer over the centre of your cheeks, sweeping along the apples and moving towards the bone of your temple. Continue by dabbing your forehead and patting down your nose. Gloss over your chin taking notice to not miss the under parts of your chin, neck and chest. This method targets the spots sun exposure highlights, allowing for a sun kissed, balanced appearance. Use a bronzing powder if you have oily skin, cream for dry skin and a mix of the two for normal skin. 3. Glowing blush To create dimension, use two different coloured bronzers or blushes. Your choice of colours depends on your skin colour. The trick to finding the optimum natural colour is to match your blush to your flush; your blush should match whatever colour your skin turns to when you’re cold or after having exercised. You can also match your blush to your lip colour. Where to apply your blush? Look in the mirror and smile… dab on the blush diagonally towards your temple over the lifted area of your cheeks. Lightly brush the blush over the rest of your face, making sure to add a little extra for your lower chin, neck and chest. Repeat with both colours. 4. In case of error The key is to start light before hitting the excessive mark. If you realise you’ve gone too heavy, apply a smidge of translucent powder over your face to lessen the intensity of the colour. If you’ve used cream blush, take a tissue and lightly dab away the colour. However, with all of the make up tips in the world sometimes you can miss the mark; if you cross the line of no return or recovery… wash it all off and start all over again! With these make up tips you’ll be applying your bronzer like a pro and be bronzed, glowing and beautiful in no time.
How to get rid of Blackheads

Sick of unsightly blackheads plaguing your face? Blackheads are caused by blocked skin pores due to a build-up of oil and dead skin cells. Here we look at how to get rid of blackheads and prevent them from occurring in the first place. 1. Wash your face daily. Don’t use cleansers that are too harsh because then your skin will produce more oils to compensate. The key is to keep the moisture on your face balanced. 2. Don’t bother with pore strips. They may look like they are working but they are expensive and they don’t treat anything below the surface of your skin. In fact, they may actually damage your skin. 3. Keep the rest of your body healthy. Drink eight glasses of water a day and stay away from junk food. Eat lots of fruit and vegetables and don’t forget to exercise -sweating can clear your pores (just wash your face afterwards). 4. Change your pillow case often. Dirt and oils get trapped in your pillowcase and then you rub your face on it each night! Eeeew! 5. Don’t overuse creamy moisturisers/make up. Keep it clean, clear and natural. 6. Use a face mask for blackhead removal. First apply a warm, wet cloth for a few minutes to widen pores, and then apply the mask as directed. 7. Use a gentle facial exfoliator to remove dead skin cells. A build-up of dead skin cells can contribute to the formation of blackheads. 8. Put some boiled water in a container. Get a towel and cover your entire head and bend over the container. Stay as long as you can take the steam. After about 15 minutes, use a wash cloth and gently squeeze the blackhead. It should not be difficult as the blackheads should come up with the steam. This is one of the best ways on how to get rid of blackheads. 9. Do not to try and extract them forcibly, either using your fingers, fingernails or a comedone (blackhead) remover. This can cause permanent damage to the pores and stop them working properly for ever. Follow these nine tips on how to get rid of blackheads and enjoy the natural glow that healthy skin will bring!
Spray Tanning Courses

Are you looking to kickstart a profitable, yet flexible career? Or do you currently work in the beauty industry but want to specialise your skills in the area of spray tanning? Here we look at why this is a great career option and the steps involved in becoming a professional spray tanner including best practices on how to spray tan and spray tanning courses you can take to learn all the tools and tricks of the trade. Spray tanning has become incredibly popular in recent years and is growing at a rapid pace. The high demand for professional spray tanners, along with the flexibility this career offers, has made this profession one rich with future growth and career potential. One benefit about becoming a professional tanner is that you don’t necessarily have to work full time. You can manage your time around your other daily tasks; whether in a salon or working from home. Many salons offer apprenticeships, where you can learn how to spray tan professionally through study that combines theory with hands on experience. Almost all salons are fully equipped to provide training however you need to be certain that the person who is training you is certified. Short spray tanning courses are available at various adult education or career centres, colleges and national training organisations. If you already have hair and beauty certifications and training you should be able to fast track your spray tanning training. Some spray tanning courses are customised for companies, which mean that you start your hands on training first through the company where you learn how to spray tan by eventually applying it on real people. This is supported by a theoretical component of your certification where you will need to attend classes. These part-time spray tanning courses tend to run after business hours for up to 4 hours a week over a few weeks. You can learn at your own pace in your on time and around your daily work schedule. Most of the time you do not need any equipment when you attend these classes but you will need a model on which to demonstrate. During your training you will learn all you need to know about how to spray tan including how spray tanning works and the history of spray tanning. You will also learn how to analyse skin types and therefore be able to confidently advise customers on tanning colours and effects to suit each client’s specific requirements. A big part of training involves interactive hands-on training on how to apply spray tan flawlessly. Training also covers the different tricks of the spray tanning industry and how to set up a tanning business. Most salons will also teach you how different tanning machines work and how to best maintain them. Spray tanning courses are a great starting point for a career in the spray tanning industry and teaching you the basics on how to spray tan. Once you have finished your short course you will obtain a certificate of completion. This certificate will assist you in employment opportunities. Often, if you start your own business you will receive ongoing marketing, business and technical support after the completion of your course, putting you in a great position to enjoy a successful career as a professional tanner.

